Wednesday, December 17, 2014

All About the Chair - Part 5: Aging

Aging

Time to age this beauty.

First I took some of the sandpaper I had on hand from earlier in the project and I sanded down parts of the chair to let the wood underneath show through. I focused on the hand rests and edges.


Remember in Part 4 of this blog, when I talked about the paint not drying between coats and how it stayed sticky for weeks? Well, when you sand paint like that, it just kind of rolls off. I had to be careful that I didn't remove too much of the paint.


My only regret at this stage is that I don't have my beautiful back yard as a background for the chair - since I had to do it in the basement (aka laundry room).


Once I was done sanding, it was time to use the stain.

For less than $5, I bought a pint of Minwax Dark Walnut Stain at my local Lowe's.
 And I had a three pack of paint brushes - Before I started the project, I wasn't sure what size I'd use.


I was afraid of spilling the stain, so I poured a small amount into an empty, clean butter container. I had several old terry cloth washcloths and hand towels on hand to wipe the stain off.


I donned by Blue Hawk Nitrile Gloves and went to work.

I dipped the tip of my brush into the stain, brushed the stain on the wood, and then immediately wiped it off. The cream of my chair became dingy and the nooks and crannies held the stain. Section by section, the chair became complete.


I was shocked at how pleased I was with the outcome.


And there. There is the swirl that I love so very much!


Sunday, December 14, 2014

All About The Chair - Part 4: Primin' & Paintin'

Primin' & Paintin'

Research online told me to choose just the right primer. All signs pointed to Zinsser. Off I trotted to my local Lowe's and I settled on this latex primer.


I purchased this little brush - whether it was the right kind of brush for the job, I do not know. All I can say is that I LOVED the short handle. It made it easy to maneuver as I put the primer coat on the chair.


I put only one coat of primer on the chair, and now that the chair is final, I believe one coat was sufficient. Though I completely covered the chair, the wood could still be seen through.


Once the primer was on, the chair sat for a few weeks, as I nervously pondered fabric, paint color and type. I needed a strategy...

I ended up settling on a lovely creamy shade of ivory/white.


Looking back, I made a mistake of putting too much paint on it too quickly. I did a coat, and then went over several parts of the chair without being patient enough for it to completely dry.
 
Though I did it in the heat of day outside, it took weeks for the chair to no longer be sticky.


Weeks after the painting, it was time to begin aging the chair. Because it had become cold inside, I needed to continue the project in the basement.
 
Next up was the anticipated aging process....


Tuesday, December 9, 2014

Citrus Foot Soak

Citrus Foot Soak

An easy recipe for a foot soak that can be packaged and gifted to friends and family!

A few ingredients - and the recipe can be increased to make larger batches, but I recommend to do no more than quadruple (x4) so that you can ensure everything mixes together well.


1/3 cup baking soda
1/2 cup Epsom salt
2 orange flavored tea bags
(note: I bought two different orange teas)
5 drops of orange essential oil
(note: I had "Pep Talk" on hand, which is a blend of sweet orange and peppermint)

I chose to package mine in small canning jars - but any sealable container would be good.

I recommend that since you don't use much of the essential oil that you buy a scent you really want to use in other endeavors.


I made labels to print and stick to the jars. 


They make a cute package! 


Sunday, December 7, 2014

All About the Chair - Part 3: Prep Work

Prep Work

I knew before any painting would take place, I'd have to sand this beauty down and address the multitude of nail holes in it.

A trip to my local Lowe's was my first for this project. I bought two types of sandpaper - a coarse grit and a fine grit. Both would be needed for the work ahead of me.


I used the rougher sand paper to go over the chair first, I saved the high grain sand paper for the end of the sanding process.

The wood, though beautiful had enough damaged spots that a sanding was required.


I also purchased some 3m Wood Filler - I was flying blind here on what type I bought, but chose this one because it is "Stainable" and I wasn't sure if I'd be staining or painting this chair. Turns out, I chose well. This tube was used completely in this project, I didn't need any more or less than this.


I don't own a putty knife, but I DO own a large and a small metal spatula for frosting a cake, and the small one was PERFECT for this job!

I squeezed the wood filler over an area, used the spatula to push the filler into the holes and scrape the filler down.


It seemed like the more holes I filled, the more holes I found.

There was also a split in one of the arm rests. I put filler in the split.


After the areas with holes were covered, I let it stand in the sun for an hour or two - until it was ready to sand. This is when I pulled out the fine sand paper and sanded the whole chair.


Once sanded, I went over the whole chair with some Blue Hawk Tack Cloth.

Tack cloth is GREAT for making sure all the fine dust of sanding is removed. Because it is so sticky, I wore gloves - I'm not a fan of sticky hands.


After this process, I had to address the wobbly chair I had in front of me. It had the potential to be sturdy, but each corner was loose and I didn't know what to do.

I took the chair to my parents' house and had a consultation with my dad.

We ended up deciding that I should use Gorilla Glue on each corner and a ratchet strap to hold the base of the chair together while the glue dried.

I took my chair home and made another trip to Lowe's.


Gorilla Glue is a GREAT product, but I highly recommend you read the instructions WELL before beginning. Dad warned me of this, and I'm glad he did. I'd not have been as careful had he not warned me.
 
Us only a small amount, the water you use to activate it will most certainly made it grow.
 
The growth was great for filling the corners of the chair and making sure it was glued together. I'm glad I was prepared with a wet rag to catch the drips.
 
If I had it to do over again, I'd have put down a drop cloth, because we now have Monkey Glue forever on the patio. It's been 5 months since it dripped there and it is still holding strong on the cement.


The ratchet strap was a BRILLIANT idea and it held the chair together wonderfully as it dried.

I sanded the areas where the Gorilla Glue dripped or grew and made sure it was smooth.

Again some Tack Cloth cleaned it up.


Round 3 complete. Now I could start looking for some fabric.


Saturday, December 6, 2014

All About The Chair - Part 2: The Clean Up

The Clean Up

After the purchase, I did much research before beginning the refurbishing project on my beautiful chair.

First things first, one must take the current fabric off, and take the stuffing out of the chair. I'm not a lover of second hand items, and my stomach turns a bit wondering what each smell and each random dropping. This process, for me, was the worst part. I wasn't sure I'd ever make this chair my own.


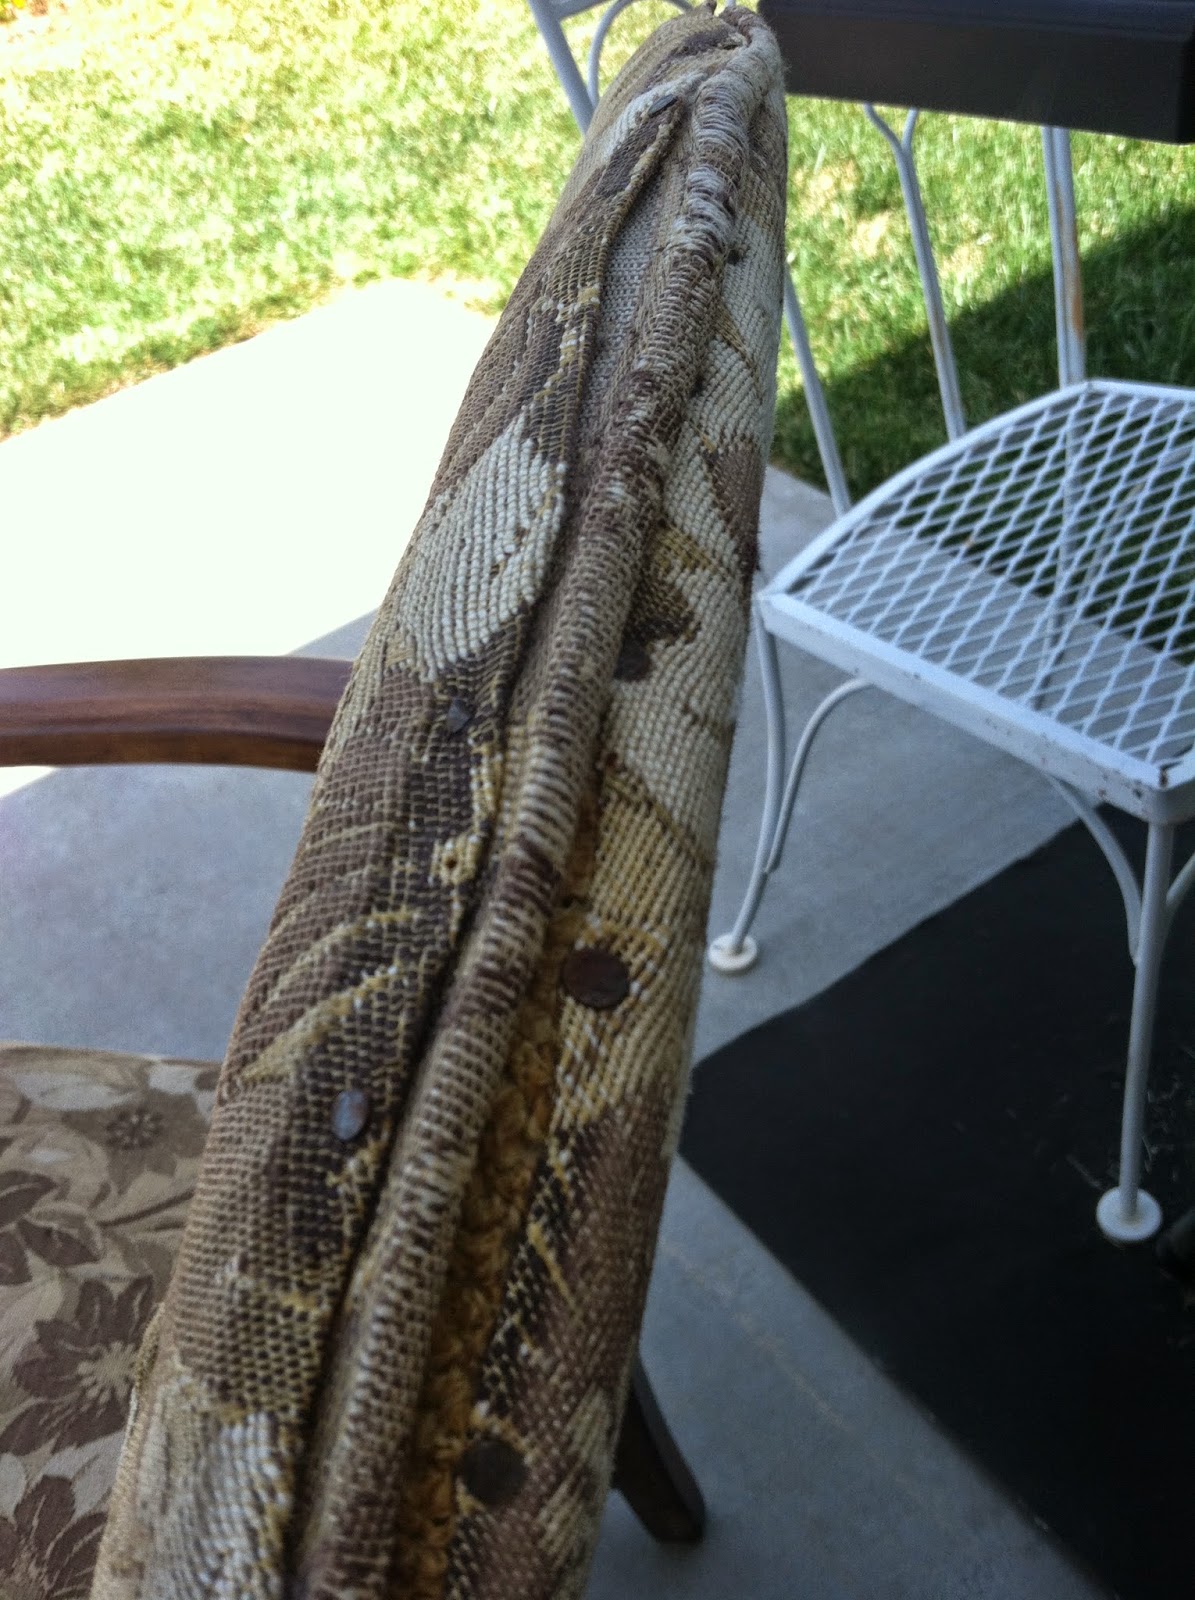
No tools were needed to take the border off the back of the chair. The rusty tacks pulled out easily.


Under the upholstery tacks were small nails.


With the removal of all the small nails came the discovery of lots of nail holes in this beautiful wood. 

 
The bottom of the chair was covered with a piece of heavy, cream-colored canvas material. The seam on it made me think the fabric was once a skirt?


Remember in Part 1 when I said I believed the chair was "over covered" - this shows that it was. Gorgeous sides on the back of the chair that should not be covered.


 Underneath the upholstery was this fabric. The back had burlap hand sewn and tacked over what could have been an original fabric.

The seat had what looked to be the original seat - because it was not tacked to the wood like the covering was.

 
Remember the thought I had about the chair being "over covered?" Here is proof. Look at those gorgeous wings on the back!

 
Behind the burlap was a think layer of foam and, what looked to be the original fabric of the chair.

 
The underneath and the back of the chair had an interesting burlap (of various qualities) hand sewn and tacked on the chair.

 
Imagine my surprise when I discovered this chair had a metal skeleton inside to hold the contents of the chair and to offer support to the seat. What a GREAT FIND!

 
The back - I believe the original fabric of the chair - worn & faded.


The seat of the chair. Faded & worn.


Inside the seat was a variety of foam, cotton batting, and scraps of the original fabric - which was maroon in color.

 
All my research told me to keep all the scraps and use them as a pattern for the recovering of the chair. I did not choose to do that, because I was not pleased with how it was covered and had full plans to do it differently.
 
Though the chair still smelled, it was slowly becoming mine.

 
It was beautiful had had great potential. And - all the while, I could not take my eyes of that swirl on the front.


Time to clean the chair. Fellow Pinners recommended TSP to clean. The instructions say to add 8 oz per 1 gallon of water. I knew I'd not need a full gallon to do this job.

After doing the math, let me share with you this lovely piece of information.

I use 2 Tablespoons for 2 cups of water. (I wrote the formula on the back of the bottle, which I believe I will use for many projects.)


Instructions on TSP encourage glove use. I spread a plastic tarp, I wasn't sure what kind of damage I'd do to the grass in my yard.
 
I recommend getting a sponge that has something that will do some good scrubbing on one side.
 
Spray the TSP/Water, let it sit, scrub it, spray it more, wipe it off with clean water. 
 
I finished by hosing the chair off and then let it sit in the sunshine and dry. I was thankful for this hot summer day!


At this point, I just looked it over and wondered.

With all those nail holes, how would I address the wood and it's appearance?

Would I paint it? What fabric would I use?

I had a lot of questions in my brain and felt the need for research and a I knew I'd need a consultation with my dad.